Installation & Measuring
It is very important to measure your drums correctly so your wrap is printed perfectly. The following instructions are provided to help you understand how to properly measure your drum and provide us with the HEIGHT and CIRCUMFERENCE of your wrap.
These are Samples of Your Drums
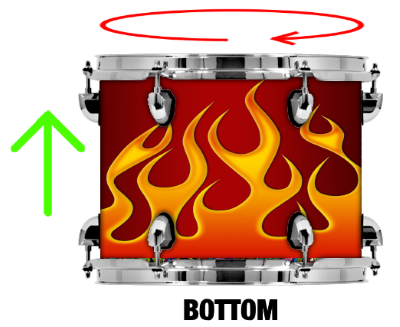
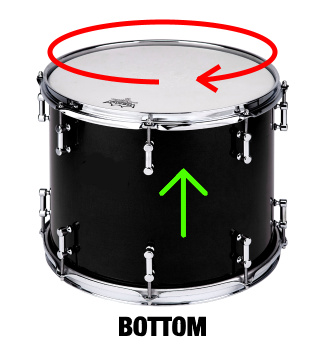
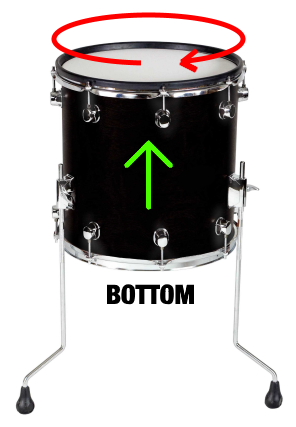
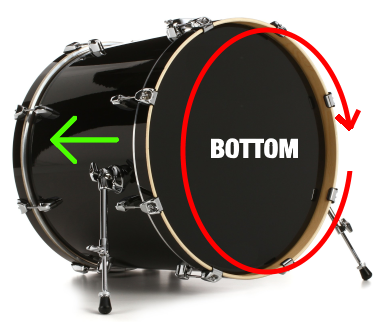
The RED arrow shows how to measure the CIRCUMFERENCE of your skin. You measure the circumference of your drum and add at least one inch so the skin can wrap around, forming a seam.
The GREEN arrow shows how to measure the HEIGHT of your skin. You measure from the BOTTOM of your drum (as noted in the image) and follow the path of the arrow. You are measuring the HEIGHT of the laminate, pattern or color currently on your drum.
So lets review for a moment. Your drums are a wooden cylinder covered in either paint, laminate or something else (represented above in black). Your hardware is attached over the laminate. What you are measuring is the laminate...you want to cover the black area of the drum itself. You will add at least 1" to the CIRCUMFERENCE in order to form a seam (the wrap material will overlap and attach to the wrap material on the other end).
So lets review for a moment. Your drums are a wooden cylinder covered in either paint, laminate or something else (represented above in black). Your hardware is attached over the laminate. What you are measuring is the laminate...you want to cover the black area of the drum itself. You will add at least 1" to the CIRCUMFERENCE in order to form a seam (the wrap material will overlap and attach to the wrap material on the other end).
Pattern Flow
As you can see in this sample, the flames start at the BOTTOM and flow following the GREEN arrow. This is exactly how the FLOW will work on the sample drums shown above. So...on the bass drum, the flames would start at the BOTTOM (the front of the bass drum) and FLOW toward the back of the bass drum where your drum pedal resides.